West Bend Bread Maker Recipes PDF: A Comprehensive Guide
Discover a wealth of West Bend bread maker recipes in PDF format, offering convenience and ease for homemade baking. Access manuals and instructions online, ensuring seamless results.
Explore diverse recipes, from classic white to specialty breads, alongside dough options for pizza and rolls. Find replacement parts and warranty details directly from West Bend.
Understanding Your West Bend Bread Maker
Your West Bend bread maker is designed for convenient, homemade bread baking. Familiarizing yourself with its features is key to success. These machines boast efficiency, simplifying the process significantly. Before diving into recipes, understand the machine’s components – the bread pan, kneading paddle, and control panel.
The control panel dictates baking cycles, crust color, and loaf size. Refer to your model’s manual (available online if lost – check the West Bend website for digital copies matched to your model number, found on the machine’s base) for specific instructions. Knowing these settings allows for customization.
Proper usage ensures optimal results. Always match your recipe to the machine’s capabilities. The West Bend Company emphasizes that the machine requires no special care beyond cleaning, and servicing should be handled by them to maintain the warranty. Remember, it’s for household use only.
Model Numbers and Manual Access
Identifying your West Bend bread maker’s model number is crucial for accessing the correct resources. Locate this number on the back or bottom of your appliance; it’s listed as a catalog or model number (e.g., 410–). This number unlocks access to specific manuals and troubleshooting guides.
If you’ve misplaced your physical manual, the West Bend Company offers digital copies online. Their website provides a list of models with corresponding manuals. However, if your model isn’t listed, a digital version isn’t currently available.
Accessing the correct manual ensures you understand your machine’s unique features and operating instructions. It details baking cycles, ingredient recommendations, and safety precautions. Remember to register your product on the West Bend website (www.westbend.com) for potential updates and support. Knowing your model number streamlines the process of finding the information you need for successful baking.
Finding Recipes Online

While West Bend provides basic instructions, a vast collection of recipes tailored for their bread makers is available online. Numerous websites and forums dedicated to bread baking feature recipes specifically adapted for West Bend models. Searching online using your bread maker’s model number alongside “recipes” will yield targeted results.
PDF recipe collections are frequently shared, offering convenient downloadable resources. These often include variations on classic breads, as well as more adventurous options like Italian herb or cinnamon raisin. Be sure to verify the source and ensure the recipe is designed for a bread machine.
Remember to prioritize recipes that align with your machine’s capabilities. Experimentation is encouraged, but starting with proven recipes ensures success. Online communities often provide valuable tips and troubleshooting advice for specific West Bend models, enhancing your baking experience.
Importance of Using Correct Recipes
Utilizing recipes specifically formulated for bread makers, and ideally for your West Bend model, is crucial for optimal results. Bread makers aren’t simply ovens; they rely on a precise sequence of kneading, rising, and baking. Standard baking recipes won’t translate effectively, often leading to dense, poorly risen loaves.
Incorrect ingredient ratios or improper timing can disrupt the machine’s cycle, impacting the final product. Recipes designed for hand-kneading often require adjustments for machine use. Following a dedicated bread machine recipe ensures the correct balance of ingredients and timing for each stage.
West Bend’s instructions emphasize the importance of using appropriate recipes to prevent machine malfunction and ensure consistent baking. Experimenting with unverified recipes may compromise the quality of your bread and potentially damage your appliance. Stick to trusted sources for best results.
Basic Bread Recipes
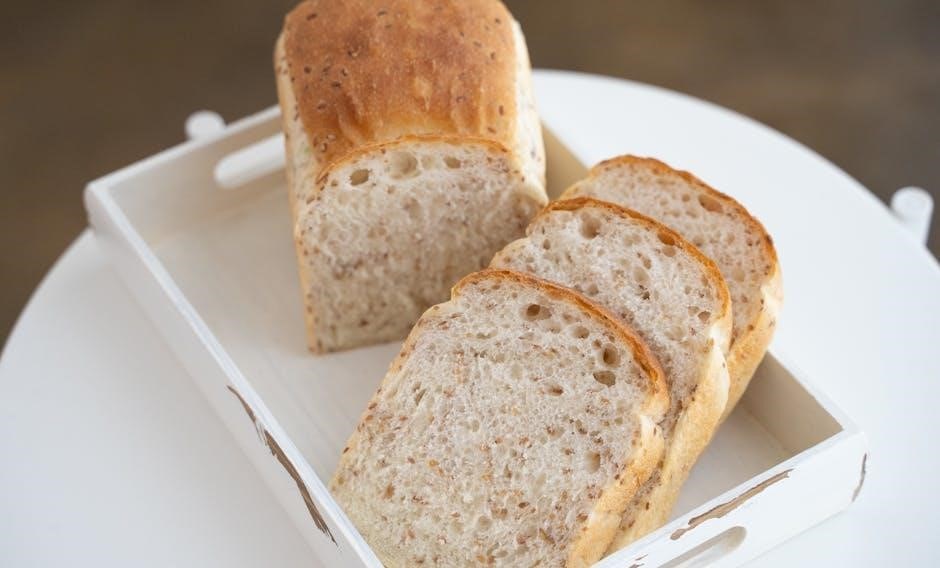
Explore fundamental recipes like classic white, whole wheat, honey wheat, and rye bread, perfect for your West Bend machine. Enjoy simple, delicious, homemade loaves!
Classic White Bread Recipe
Yields: 1 loaf (approximately 1.5 pounds)
Ingredients:
- 1 ¼ cups warm water (105-115°F)
- 2 tablespoons sugar
- 2 ¼ teaspoons active dry yeast (1 packet)
- 3 tablespoons vegetable oil
- 1 ½ teaspoons salt
- 3 ½ ౼ 3 ¾ cups bread flour
Instructions:
- Add water, sugar, and yeast to the bread maker pan. Let stand for 5 minutes until foamy.
- Add oil and salt;
- Gradually add flour, 1 cup at a time, mixing after each addition.
- Select the “Basic” or “White Bread” cycle on your West Bend bread maker.
- Set the crust color to “Medium” or your preference.
- Press start and allow the bread maker to complete the cycle (approximately 3-4 hours).
- Once the cycle is complete, remove the loaf from the pan and let cool completely before slicing and enjoying.
Tip: For a softer crust, add 1 tablespoon of butter or shortening to the pan with the other ingredients.
Whole Wheat Bread Recipe
Yields: 1 loaf (approximately 1.5 pounds)
Ingredients:
- 1 ¼ cups warm water (105-115°F)
- 2 tablespoons honey or maple syrup
- 2 ¼ teaspoons active dry yeast (1 packet)
- 2 tablespoons vegetable oil
- 1 ½ teaspoons salt
- 2 cups whole wheat flour
- 1 ½ cups bread flour
Instructions:
- Combine warm water, honey, and yeast in the bread maker pan; let stand 5 minutes until foamy.
- Add oil and salt to the yeast mixture.
- Gradually add whole wheat flour and then bread flour, mixing after each addition;
- Select the “Whole Wheat” cycle on your West Bend bread maker.
- Choose your desired crust color (light, medium, or dark).
- Press start and allow the bread maker to complete the cycle (typically 3-4 hours).
- Remove the loaf and cool completely on a wire rack before slicing.
Honey Wheat Bread Recipe
Yields: 1 loaf (approximately 1.5 pounds)
Ingredients:
- 1 ¼ cups warm water (105-115°F)
- 2 tablespoons honey
- 2 ¼ teaspoons active dry yeast (1 packet)
- 2 tablespoons vegetable oil
- 1 ½ teaspoons salt
- 2 cups whole wheat flour
- 1 cup bread flour
- 1 tablespoon honey (additional, for flavor)
Instructions:
- Combine warm water, 2 tablespoons honey, and yeast in the bread maker pan; let stand 5 minutes.
- Add oil and salt to the yeast mixture.
- Gradually add whole wheat flour and bread flour, mixing after each addition.
- Add the additional tablespoon of honey.
- Select the “Sweet” or “Basic” cycle on your West Bend bread maker.
- Choose your desired crust color.
- Press start and allow the bread maker to complete the cycle.
- Remove the loaf and cool completely before slicing.
Tip: For a richer flavor, use a darker honey variety. Adjust honey to taste.
Rye Bread Recipe
Yields: 1 loaf (approximately 1.5 pounds)
Ingredients:
- 1 ¼ cups warm water (105-115°F)
- 1 tablespoon honey
- 2 ¼ teaspoons active dry yeast (1 packet)
- 1 tablespoon vegetable oil
- 1 ½ teaspoons salt
- 1 ½ cups rye flour
- 1 cup bread flour
- 1 tablespoon caraway seeds (optional)
Instructions:
- Combine warm water, honey, and yeast in the bread maker pan; let stand 5 minutes.
- Add oil and salt to the yeast mixture.
- Gradually add rye flour and bread flour, mixing after each addition.
- Stir in caraway seeds, if desired.
- Select the “Rye” cycle on your West Bend bread maker, if available.
- If no rye cycle, use the “Basic” cycle.
- Choose your desired crust color.
- Press start and allow the bread maker to complete the cycle.
- Remove the loaf and cool completely before slicing.
Tip: Rye flour can result in a denser loaf. Ensure proper hydration for best results. Caraway seeds enhance the traditional rye flavor.
Specialty Bread Recipes
Expand your baking with unique West Bend recipes! Explore French, Italian herb, cinnamon raisin, and sourdough adaptations in PDF guides for delightful flavors.
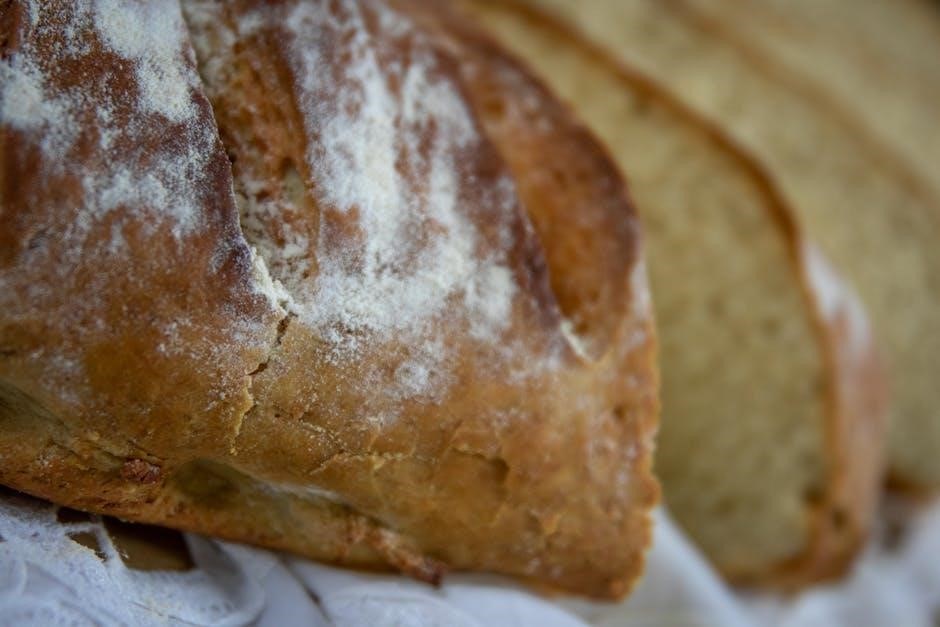
French Bread Recipe
Achieve a delightful, crusty French bread loaf right in your West Bend bread maker! This recipe, often found within comprehensive PDF recipe collections, utilizes simple ingredients for an authentic taste. Begin with 1 ¼ cups of warm water, 1 teaspoon of sugar, and 2 ¼ teaspoons of active dry yeast. Allow this mixture to bloom for 5-10 minutes until foamy.
Next, add 3 ½ cups of bread flour, 1 ½ teaspoons of salt, and 1 tablespoon of olive oil to the bread maker pan. Pour in the yeast mixture and select the ‘French Bread’ cycle, if available, or utilize a similar dough cycle followed by a bake cycle.
For a truly authentic crust, consider lightly spraying the loaf with water before baking. Baking times will vary depending on your West Bend model, typically ranging from 60-80 minutes. Consult your machine’s manual or a dedicated PDF recipe guide for precise settings. Enjoy warm with butter or your favorite accompaniment!
Italian Herb Bread Recipe
Elevate your bread-making with a fragrant Italian Herb Bread, easily crafted in your West Bend bread maker! Many detailed PDF recipe guides offer variations, but a classic approach begins with 1 ¼ cups of warm water, 1 tablespoon of olive oil, and 2 ¼ teaspoons of active dry yeast – allow to bloom.
Combine 3 ½ cups of bread flour, 1 ½ teaspoons of salt, 1 tablespoon of dried Italian herb blend (rosemary, oregano, basil, thyme), and the yeast mixture in your bread maker pan. Select the ‘Dough’ cycle initially, then switch to ‘Bake’ for a golden-brown crust.
For enhanced flavor, consider adding a clove of minced garlic to the dough. Baking typically takes around 60-75 minutes, depending on your West Bend model. Refer to your machine’s manual or a comprehensive PDF resource for specific cycle times. This bread pairs wonderfully with pasta dishes or enjoyed on its own!
Cinnamon Raisin Bread Recipe
Indulge in the comforting aroma of homemade Cinnamon Raisin Bread, perfectly achievable with your West Bend bread maker! Numerous PDF recipe collections provide detailed instructions, but a standard recipe starts with 1 ¼ cups of warm milk, 2 tablespoons of sugar, and 2 ¼ teaspoons of active dry yeast – let it proof.
Combine 3 ½ cups of bread flour, ½ teaspoon of salt, ½ cup of raisins, 2 tablespoons of melted butter, and the yeast mixture in the bread maker pan. Add 1-2 teaspoons of ground cinnamon, adjusting to your preference. Select the ‘Sweet’ or ‘Cake’ cycle on your machine.
Many PDF guides suggest adding a sprinkle of cinnamon and sugar halfway through the baking cycle for an extra burst of flavor. Baking time usually ranges from 60-80 minutes. Consult your West Bend manual or a detailed PDF for precise cycle durations. Enjoy warm with a pat of butter!
Sourdough Bread Recipe (Adaptation)
Adapting a traditional sourdough recipe for your West Bend bread maker requires a slightly modified approach, often detailed in specialized PDF guides. Begin with a mature sourdough starter – approximately ½ cup – combined with 1 ½ cups of warm water and 1 tablespoon of sugar. Allow this mixture to activate for about 10 minutes.
Next, add 4 cups of bread flour and 1 ½ teaspoons of salt to the bread maker pan. Pour in the sourdough starter mixture. Select the ‘Dough’ cycle initially, allowing the machine to knead and develop the gluten. After the dough cycle completes, let it rest for 20-30 minutes.
Many PDF resources recommend reshaping the dough and placing it in a greased loaf pan for the final rise and bake in a conventional oven, as bread makers often struggle with the long fermentation times of true sourdough. However, some models offer a ‘Sourdough’ setting – consult your manual!
Dough Recipes
Utilize your West Bend bread maker beyond loaves! PDF guides unlock versatile dough recipes for pizza, rolls, and pretzels, simplifying homemade baking endeavors.
Pizza Dough Recipe
Creating delicious pizza dough in your West Bend bread maker is surprisingly simple! Many PDF recipe resources detail the process, offering a convenient alternative to traditional kneading. Typically, the cycle utilizes the dough setting, combining ingredients like flour, water, yeast, olive oil, and a touch of sugar and salt.
Begin by adding the wet ingredients first, followed by the dry. Ensure the yeast isn’t directly contacting the liquid initially. Select the dough cycle and allow the machine to work its magic, developing a smooth and elastic dough. Once complete, remove the dough, punch it down gently, and proceed with shaping your pizza.
PDF guides often provide variations, including whole wheat options or additions like herbs. Remember to adjust quantities based on your bread maker model and desired pizza size. Enjoy fresh, homemade pizza with minimal effort, thanks to your West Bend appliance and readily available recipes!
Roll Dough Recipe
Utilizing your West Bend bread maker for roll dough is a fantastic time-saver! Numerous PDF recipe collections showcase how to achieve perfectly risen dough with minimal effort; The process generally involves adding ingredients – flour, water, yeast, sugar, salt, and often butter or milk – directly into the bread maker pan.
Select the dough cycle, allowing the machine to knead and rise the dough to optimal consistency. Once the cycle completes, gently remove the dough and shape it into your desired roll size and form. Whether you’re crafting dinner rolls, cinnamon rolls, or sweet rolls, the bread maker provides a consistent base.
PDF resources frequently offer variations, including enriched doughs with eggs for a softer texture. Remember to consult your bread maker’s manual for specific cycle times and ingredient recommendations. Enjoy warm, freshly baked rolls effortlessly with your West Bend appliance!
Pretzel Dough Recipe
Creating authentic pretzel dough in your West Bend bread maker is surprisingly achievable with the right PDF recipe! While slightly more involved than basic bread dough, the machine handles the initial kneading and rising beautifully. Key ingredients include flour, water, yeast, sugar, salt, and importantly, a fat source like butter or oil.
The unique element for pretzels is a boiling step after the bread maker cycle. Once the dough is ready, shape it into ropes, boil briefly in a baking soda solution (this creates the characteristic pretzel flavor and texture), and then bake until golden brown.
PDF guides often detail precise measurements for the baking soda bath and baking temperatures. Remember to consult your bread maker’s manual for appropriate dough cycle settings. Enjoy homemade, soft pretzels with your favorite dipping sauces – a delightful treat made easier with your West Bend machine!
Troubleshooting & Maintenance
Address common issues and ensure longevity! Regularly clean your West Bend bread maker, replace worn parts like pans and knead bars, and review warranty details.
Common Bread Maker Issues
Encountering problems with your West Bend bread maker is common, but often easily resolved. A frequent issue is a loaf collapsing, usually due to excessive liquid or insufficient gluten development. Ensure accurate measurements and consider using bread flour for better structure.
Another challenge is uneven rising. This can stem from uneven ingredient distribution or a malfunctioning heating element. Thoroughly mix ingredients and check the heating element’s consistency during operation.
Sometimes, the kneading blade might become stuck. Stop the machine immediately and carefully remove the blade, ensuring it’s properly reattached before restarting. A burnt smell often indicates excess sugar or a prolonged baking cycle; adjust accordingly.
If the bread is dense or gummy, it could be underbaked or have too much moisture. Extend the baking time slightly or reduce liquid in future attempts. Remember, consistent results require careful attention to recipes and machine maintenance.
Always refer to your manual for specific troubleshooting guidance related to your model.
Cleaning Your West Bend Bread Maker
Maintaining your West Bend bread maker is crucial for optimal performance and longevity. After each use, unplug the machine and allow all components to cool completely before cleaning. The bread pan and kneading blade are typically dishwasher-safe, but hand washing with warm, soapy water is recommended to preserve their non-stick coating.
Avoid abrasive cleaners or scouring pads, as these can damage the surfaces. Wipe the exterior of the bread maker with a damp cloth. For stubborn residue inside the baking cavity, use a slightly damp cloth and mild detergent, ensuring no water enters the electrical components.
Regularly inspect the heating element for crumbs and gently brush them away. Do not immerse the bread maker in water. Proper cleaning prevents buildup and ensures hygienic bread making.
Remember to dry all parts thoroughly before reassembling and storing your West Bend bread maker. Following these steps will keep your machine in excellent condition.
Replacing Bread Pans and Knead Bars
Over time, the bread pan and knead bar of your West Bend bread maker may show wear and tear; Fortunately, replacements are readily available directly from The West Bend Company, ensuring continued baking success. To order, you can write to their address or conveniently order online through their website.
When ordering, it’s essential to include your bread maker’s catalog number (typically 410–) found on the back of the machine. Provide a clear description of the part you need – bread pan or knead bar – and specify the quantity. Accurate information speeds up the process.
Regularly checking and replacing these components maintains optimal dough mixing and loaf shaping. Worn knead bars can affect dough consistency, while damaged pans can lead to uneven baking.
Investing in replacement parts extends the life of your West Bend bread maker and guarantees consistently delicious homemade bread for years to come.
Warranty Information and Servicing
Your West Bend bread maker is designed for lasting performance, but should servicing ever become necessary, it’s crucial to follow the proper procedure to maintain warranty coverage. Do not attempt to repair the appliance yourself, as this will void the warranty and could potentially cause further damage or safety hazards.
Instead, return your bread maker directly to The West Bend Company for authorized servicing. Detailed warranty information, including the duration of coverage and specific terms, can be found within the booklet accompanying your appliance.
Refer to the warranty section for specific instructions on how to initiate a service request and where to ship the unit. Following these guidelines ensures a smooth and efficient repair process.
Maintaining your warranty safeguards your investment and guarantees professional repair services, keeping your West Bend bread maker in optimal working condition for years of baking enjoyment.
Advanced Techniques
Master recipe adjustments, flour variations, and ingredient functions for customized bread. West Bend allows experimentation, enhancing your baking skills and recipe personalization.
Adjusting Recipe Quantities
Successfully modifying recipe quantities in your West Bend bread maker requires understanding its capacity and ingredient balance. While the machine handles a range of loaf sizes, drastic alterations can impact texture and rise. Generally, you can safely adjust recipes by 25% up or down, maintaining proportional ingredient ratios.
For smaller loaves, reduce all ingredients accordingly; conversely, increase them for larger batches. However, be mindful of the liquid-to-dry ingredient ratio, as this significantly affects dough consistency. Too much liquid results in a sticky dough, while too little leads to a dry, crumbly loaf. Always start with small adjustments and observe the dough’s behavior during the kneading cycle.
Remember that yeast quantity is crucial; adjust it proportionally with flour. Over-yeasting can cause a rapid rise and collapse, while under-yeasting results in a dense bread. Precise measurements are key, and using a kitchen scale is highly recommended for consistent results. Refer to your West Bend manual for specific capacity guidelines and recommended adjustments.
Using Different Flour Types
Experimenting with various flour types in your West Bend bread maker expands baking possibilities, but requires understanding each flour’s properties. All-purpose flour is a reliable base, while bread flour, with its higher protein content, yields chewier textures ideal for artisan loaves. Whole wheat flour adds nuttiness and fiber, but absorbs more liquid, potentially requiring adjustments.
Rye flour contributes a distinctive flavor, but lacks gluten, so it’s best combined with bread flour. Gluten-free flours, like almond or rice flour, necessitate specialized recipes and often require binding agents like xanthan gum. When substituting flours, start by replacing 25% of the all-purpose flour and observe the dough’s consistency.
Adjust liquid levels as needed, as different flours have varying absorption rates. High-protein flours generally require more liquid, while whole grain flours may need extra; Always consult recipes specifically designed for the flour type you’re using for optimal results and refer to your West Bend manual for guidance.
Understanding Ingredient Functions
Successful bread making with your West Bend relies on grasping each ingredient’s role. Flour provides structure through gluten development, activated by kneading and hydration. Yeast is the leavening agent, producing carbon dioxide for rise; ensure it’s fresh for optimal performance.
Liquids (water, milk) hydrate the flour, initiating gluten formation and dissolving yeast. Sugar feeds the yeast, adds sweetness, and contributes to browning. Salt controls yeast activity, strengthens gluten, and enhances flavor. Fats (oil, butter) tenderize the crumb and add richness.
Eggs enrich dough, improve texture, and contribute to color; Understanding these functions allows for informed substitutions and adjustments. For example, increasing liquid compensates for drier flours, while reducing sugar slows yeast activity. Refer to your West Bend recipe PDF for specific ingredient ratios and their impact on the final product.
Recipe Customization Tips
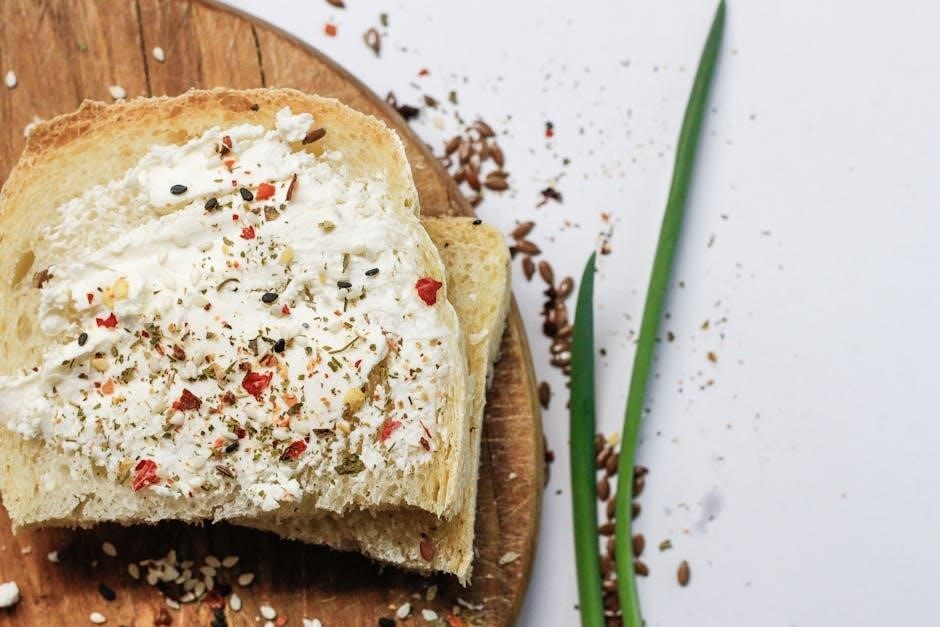
Elevate your West Bend bread making by experimenting with customization! Start by adding seeds (sunflower, flax) or nuts for texture and flavor – about ¼ to ½ cup per loaf. Spices like cinnamon, nutmeg, or herbs (rosemary, thyme) can transform a basic recipe.
Adjust sweetness by varying sugar or honey levels, keeping yeast activity in mind. For a softer crust, add a tablespoon of oil or melted butter. Explore different flour blends; a portion of whole wheat adds nuttiness. Always refer to your West Bend recipe PDF as a base.
Remember to adjust liquid levels when altering flour types. Small changes yield noticeable results. Document your modifications to refine your perfect loaf. Don’t be afraid to experiment, but track your adjustments for consistent, delicious outcomes with your bread maker!